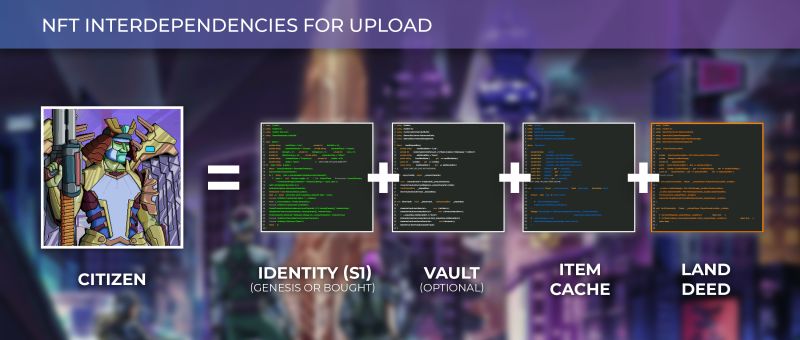
If Web3 functionality of the official website is unreachable or disabled, a Citizen can be created interacting with the Citizen contract and all the component contracts on Etherscan.
Using Etherscan and contracts to upload
This process requires the user to write information to several contracts with ethereum transactions using the wallet containing the correct Neo Tokyo component NFTs.
Requirements
Creating a Citizen requires:
- Enough ETH for multiple transaction fees (0.02+ to ensure that you can complete the process)
- These component NFTs must be in the ethereum wallet you are connecting to Etherscan:
- An Identity or a Bought Identity
- Item Cache
- Land Deed NFT
- (Optional) a Vault can be used to increase the $BYTE yield of the resulting Citizen.
- The token ID for each component
Note: You can reduce costs by uploading a Citizen when gas fees are low.
Etherscan Instructions
Set approval for all of the component contracts
You’ll need to do this before uploading: To approve you need to go into each contract and call "setApprovalForAll". Pass in the citizen contract (0xb668beB1Fa440F6cF2Da0399f8C28caB993Bdd65) as the operator, and 1 for approved
Upload via the Citizen contract
- Open the Citizen contract, click the Contract tab, and click the Write Contract tab within that frame.
- Use the Connect to Web3 button to connect your wallet with the required components and ethereum.
- Expand function 4,
4.createCitizen.and fill in every parameter with the correct token ID for each of your component NFTs.- If you don't have a vault, put
0. - Select
0for a male Citizen or1for a female Citizen. - specialMessage is a custom message associated with your Citizen that will appear on exchanges in the description field. If you want to leave that field empty use
"".
- If you don't have a vault, put
If you get an error, make sure you set approval for all in the component contracts.
