| Line 6: | Line 6: | ||
* Enough ETH for multiple transaction fees (0.02+ to ensure that you can complete the process) | * Enough ETH for multiple transaction fees (0.02+ to ensure that you can complete the process) | ||
* These component NFTs must be in the ethereum wallet you are connecting to Etherscan: | * These component NFTs must be in the ethereum wallet you are connecting to Etherscan: | ||
** An [[Identity]] or a [[Bought Identity]] | ** An [[Neo_Tokyo_Identities_(NEOTI)|Identity]] or a [[Neo_Tokyo_Bought_Identities_(NEOTBI)| Bought Identity]] | ||
** [[Item Cache]] | ** [[Neo Tokyo Part 3 Item Caches (NTITEM)|Item Cache]] | ||
** [[Land Deed]] NFT | ** [[Neo Tokyo Part 4 Land Deeds (NTLD)|Land Deed]] NFT | ||
** (Optional) a [[Vault]] can be used to increase the [[$BYTE]] yield of the resulting Citizen. | ** (Optional) a [[Vault]] can be used to increase the [[Bytes | $BYTE]] yield of the resulting Citizen. | ||
* The token ID for each component | * The token ID for each component | ||
Revision as of 11:56, 21 September 2022
If Web3 functionality of the official website is unreachable or disabled, a Citizen can be created interacting with the Citizen contract and all the component contracts on Etherscan.
Requirements
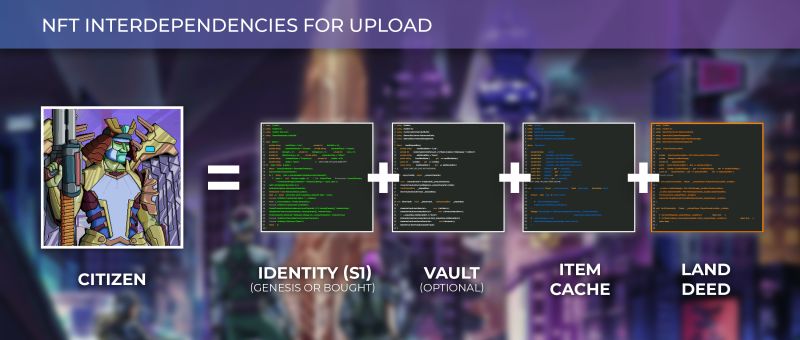
Creating a Citizen requires:
- Enough ETH for multiple transaction fees (0.02+ to ensure that you can complete the process)
- These component NFTs must be in the ethereum wallet you are connecting to Etherscan:
- An Identity or a Bought Identity
- Item Cache
- Land Deed NFT
- (Optional) a Vault can be used to increase the $BYTE yield of the resulting Citizen.
- The token ID for each component
Note: You can reduce costs by uploading a Citizen when gas fees are low.
Etherscan Instructions
| Contract | Etherscan URL |
|---|---|
| Citizen Contract | https://etherscan.io/address/0xb668beb1fa440f6cf2da0399f8c28cab993bdd65#writeContract |
| ID or Bought ID (you only need one of the Identity contracts, depending on your ID) | ID: https://etherscan.io/address/0x86357a19e5537a8fba9a004e555713bc943a66c0#writeContract -- Bought ID: https://etherscan.io/address/0x835a60cc60b808e47825daa79a9da6c9ff3a892e#writeContract |
| Items Cache | https://etherscan.io/address/0x0938e3f7ac6d7f674fed551c93f363109bda3af9#writeContract |
| Land Deed | https://etherscan.io/address/0x3c54b798b3aad4f6089533af3bdbd6ce233019bb#writeContract |
| Vault (optional) | https://etherscan.io/address/0xab0b0dd7e4eab0f9e31a539074a03f1c1be80879#writeContract |
Set approval for all of the component contracts
Before interacting with the Citizen contract, you will need to set approvals for the component contracts. To set approvals,
- Open the contract, click the Contract tab, and click the Write Contract tab within that frame.
- Use the Connect to Web3 button to connect your wallet with the required components and ethereum.
- navigate to the function
8. setApprovalForAllfunction each contract.- For "operator (address)":
0xb668beB1Fa440F6cF2Da0399f8C28caB993Bdd65(the Citizen contract address). - For "approved (bool)":
1
- For "operator (address)":
Upload via the Citizen contract
- Open the Citizen contract, click the Contract tab, and click the Write Contract tab within that frame.
- Use the Connect to Web3 button to connect your wallet with the required components and ethereum.
- Expand function 4,
4.createCitizen.and fill in every parameter with the correct token ID for each of your component NFTs.- If you don't have a vault, put
0. - Select
0for a male Citizen or1for a female Citizen. - specialMessage is a custom message associated with your Citizen that will appear on exchanges in the description field. If you want to leave that field empty use
"".
- If you don't have a vault, put
If you get an error, make sure you set approval for all in the component contracts.
